
This guide will walk you through every step of the process, ensuring your homemade canned vegetable soup without meat is not only delicious but also safe and shelf-stable.

Why Can Your Own Vegetable Soup?
Canning your own vegetable soup allows you to control the ingredients, avoid preservatives, and customize flavors to your preference. It’s an excellent way to make the most of garden harvests or bulk purchases from local farmers. Plus, having a pantry stocked with homemade canned soup is incredibly convenient, especially during busy times or in emergency situations.
Variation Ideas For Canned Vegetable Soup
Most vegetables, dried beans, or peas can be added to this soup recipe. However, if dried beans are used, they must be rehydrated first. NOTE * List of vegetables that can not be added to your soup below.
This recipe is flexible enough to add your favorite vegetables or what your garden is producing an abundance of. You could substitute the potatoes for sweet potatoes, add peppers, peas, turnips, or cubed winter squash. Just keep in mind the thickness of cubes and slices should remain consistent with what the recipe calls for.
Can I substitute water for vegetable broth?
Absolutely. Using water instead of broth will result in a slightly less rich flavor, but it’s still delicious.
What vegetables are not safe to can in vegetable soup?
- Broccoli
- Brussels Sprouts (can be pickled then canned)
- Cabbage
- Cauliflower (can be pickled then canned)
- Eggplant (can be pickled then canned)
- Kohlrabi. “Canning kohlrabi is not recommended because it develops a strong flavor and usually discolors when canned.”
- Lettuce
- Zucchini and Summer Squashes (can be pickled; otherwise, there would be density issues for pressure canning).
Is it ok to use frozen vegetables when canning vegetable soup?
There is no safety issue in canning food that was previously frozen. However, the quality issues are that the food could result in an undesirable texture. For instance, green beans that were blanched for freezing, then frozen, then thawed, then canned will be soft and mussy. If you want to use frozen vegetables in your canning, I suggest using firm vegetables such as potatoes and carrots.
Can pasta or rice be added to home canned soup?
Only add noodles or other pasta, rice, flour, cream, milk, or other thickening agents to home canned soups after being canned during the reheating process.

Canning Vegetable Soup Tips and Safty Guidelines
Can I use a water bath for canning soup?
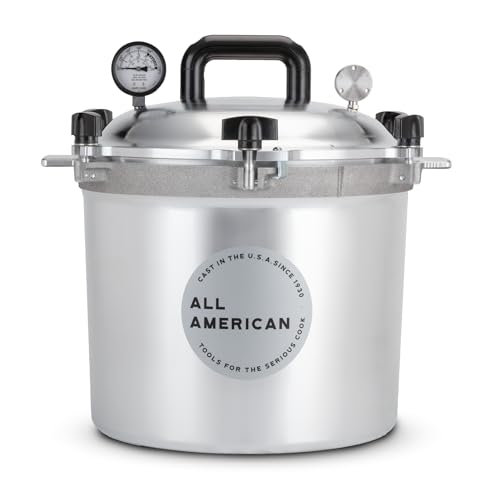
According to the National Center For Home Food Preservation, vegetable-based soups are usually mixtures of low-acid ingredients, and they need to be pressure canned by a process that has been developed by research methods known to control botulism food poisoning. Vegetable or vegetable-meat soups can not be canned safely in a boiling water canner.
Because vegetable soup is a low-acid food, a pressure canner is the only way to home can it to prevent botulism, a potentially fatal foodborne sickness.
Can you pressure can in an Instant Pot?
According to the National Center for Home Preservation, you should not use an electric pressure cooker to safely can with. Even if there are instructions for pressure canning in the manufacturer’s directions, we do not support the use of the USDA canning processes in the electric, multi-cooker appliances now containing “canning” or “steam canning” buttons on their front panels.
The key to canning a safe, high-quality soup is following directions from a reliable science-based source like USDA. Do not deviate from the recipe instructions unless it is stated to be safe.
How long does canned food last?
Properly canned food stored in a cool, dry place will retain optimum eating quality for at least 1 year. Canned food stored in a warm place near hot pipes, a range, a furnace, or indirect sunlight may lose some of its eating quality in a few weeks or months, depending on the temperature. Dampness may corrode cans or metal lids and cause leakage so that the food will spoil.
Favorite Canning Supplies
How To Reheat Home Canned Soups
Heat the soup in a pan over medium heat, occasionally stirring, until hot, or reheat in the microwave. Store any leftovers in an air-tight container in the refrigerator for up to 3 days.

Easy Guide For Canned Vegetable Soup Without Meat
Ingredients
- 2 quarts tomatoes, chopped, about 12 medium
- 1 1/2 quarts potatoes, peeled and cubbed, about 9 medium
- 1 1/2 quarts carrots, peeled and sliced, about 12 medium
- 1 quart lima beans, fresh or frozen
- 1 quart corn, whole kernel, uncooked, about 8 medium ears
- 2 cups celery, sliced, about 4 stalks
- 2 cups onions, chopped small, about 2 or 3 medium onions
- 1 teaspoon salt, or to taste
- 1/2 teaspoon black pepper , or to taste
- 1 1/2 quarts vegetable broth, can be substitute with water but I suggest adding vegetable bullion to the water.
Instructions
PREP
- Wash tomatoes, potatoes, carrots, lima beans, corn, and celery under cold running water; drain.2 quarts tomatoes, 1 1/2 quarts potatoes, 1 1/2 quarts carrots, 1 quart lima beans, 2 cups celery
- To peel tomatoes, blanch 30 to 60 seconds in boiling water. Immediately transfer to cold ice water. Cut off peel and core tomatoes. Chop tomatoes; measure 2 quarts of chopped tomatoes. You could also peel your tomatoes using my easy oven bake method for peeling tomatoes.
- Peel potatoes. Cut potatoes into 1/2 inch cubes; measure 1 1/2 quarts of cubed potatoes.
- Remove stem end from carrots and peel. Slice carrots 1/4 inch thick; measure 1 1/2 quarts sliced carrots.
- Cut corn off the cob, starting at the small end and moving downward o the stem end; measure 1 quart of whole kernel corn.1 quart corn
- Remove leafy tops and root ends from celery. Cut celery into 1-inch slices; measure 2 cups sliced clery.
- Peel the onion and cut off the root end. Chop onions; measure 2 cups chopped onions.2 cups onions
COOK
- Pour the vegetable broth and all of the ingredients, except salt and pepper, in a large saucepan. Bring mixture to a boil. Reduce heat to a simmer (180 degrees). Simmer for 15 minutes.
- Season soup with salt and pepper to taste, if desired.
FILL
- Ladle hot soup into clean hot jars, leaving 1-inch headspace. Remove air bubbles. Clean jar rim. Center the lid on the jar and adjust the bad to fingertip-tight. Place jar on the rack in pressure canner containing 2 inches of simmering water (180 degrees) Repeat until all the jars are filled.
PROCESS
- Place the lid on the pressure canner and turn the lid to the locked position. Adust heat to medium-high. Vent steam for 10 minutes. Put the weighted gauge on the vent; bring pressure to 10 pounds (psi).
- Process pint jars for 60 minutes or quart jars for 75 minutes. See the chart below for types of canner and elevations.
COOLING & STORAGE
- After processing time is done, turn off the heat; cool the canner to zero pressure.
- Carefully remove the lid. Let jars cool 10 minutes in the canner.
- Remove jars with jar lifter from the canner and place them on a towel-covered countertop. Do not retighten bands if loose. Allow to cool for 24 hours.
- Check seals and then label with name and date. Store in a cool dark pantry
Gina’s Notes and Tips
| Recommended process time for Soups in a dial-gauge pressure canner. | ||||||
| Canner Pressure (PSI) at Altitudes | ||||||
| Style of Pack | Jar Size | Process Time | 0 – 2,000 ft | 2,001 – 4,000 ft | 4,001 – 6,000 ft | 6,001 – 8,000 ft |
| Hot | Pints | 60* min | 11 lb | 12 lb | 13 lb | 14 lb |
| Quarts | 75* | 11 | 12 | 13 | 14 | |
| * Caution: Process 100 minutes if soup contains seafoods. | ||||||
| Recommended process time for Soups in a weighted-gauge pressure canner | ||||
| Canner Pressure (PSI) at Altitudes of | ||||
| Style of Pack | Jar Size | Process Time | 0 – 1,000 ft | Above 1,000 ft |
| Hot | Pints | 60* min | 10 lb | 15 lb |
| Quarts | 75* | 10 | 15 | |
| * Caution: Process 100 minutes if soup contains seafoods. | ||||
- Visual Inspection: After removing the jars from the pressure canner and allowing them to cool, visually inspect the lids. A properly sealed lid will be slightly concave or “dome-shaped” in the center. If the lid is flat or indented, it indicates a good seal. Be sure to remove any screw bands before inspecting.
- Lid Testing: Gently press down on the center of the lid with your finger. A properly sealed lid should not flex or move. If the lid remains firmly in place and doesn’t pop back, it indicates a good seal.
- Listen for the “Ping”: During the cooling process, you may hear a “ping” or popping sound. This sound is an indication that the jars have sealed properly. However, it’s important to note that not all properly sealed jars may make this sound, so it should not be relied upon as the sole indicator of a good seal.
- Finger Tightness: Once the jars have cooled completely, remove the screw bands and gently try to lift the jar by holding onto the lid. If the lid holds securely and does not detach from the jar, it indicates a proper seal.


Please email me this recipe! Thanks!
Hello LeAnn, If you scroll down to the bottom of the page you will see the recipe card. Under the review stars there is a little printer button and then the word PRINT. Click that and you will be to print the recipe card on regular paper in your printer.
CANNED VEGETABLE SOUP
https://intentionalhospitality.com/canned-vegetable-soup/
I am.making a Soup with carrots,celery,onions and dry beans and chicken broth with seasonings
I will put them in pint jars. How long to.pressure cook. The chicken broth is box not fresh.
No meat in soup mix
Judy, you mentioned dry beans. I highly suggest to do a quick soak on the beans. This will ensure they are tender and not chewy. Dry beans take longer than other veggies to process. See instructions below for doing a quick rehydrating of the beans.
It does not matter if you are using homemade chicken broth or boxed broth, the processing time is the same. I have updated the post with a chart in the recipe card for how long to process homemade canned soup. Size of jars and. your elevation will make processing times a bit different.
Step 1: Sorting and Rinsing
Start by sorting through your dry beans, removing any debris, damaged beans, or stones you may find. Then, give them a thorough rinse under cold water to remove any dust or dirt. This step ensures that your beans are clean and ready for rehydration.
Step 2: Boiling Water
In a large pot, add four cups of water for every cup of dry beans. Bring the water to a rapid boil over high heat. The hot water will expedite the rehydration process, reducing the overall cooking time.
Step 3: Quick Soak
Once the water is boiling, remove the pot from heat and carefully add the rinsed dry beans. Ensure that the beans are fully submerged in the hot water. Cover the pot with a lid and let them sit for one hour. This quick soak method helps soften the beans and kick-starts the rehydration process.
Step 4: Draining and Rinsing
After one hour, drain the water from the pot. At this point, you’ll notice that your beans have absorbed a significant amount of water and have become plumper. Rinse the beans with cold water to remove any residual starch or impurities.
Hi! I love your site!!!! New to canning and I have zucchini to use up. Can I switch out the corn for zucchini and cannellini beans for the limas?
You sure can. Just be sure and keep the processing time the same. Sounds yummy!
Can I leave out the Lima beans? Hubby does not eat beans.
Thank you
Absolutely, you can leave out the lima beans. I have a no-beans hubby too. Just add more of the other veggies to equal the quart of limeas you are leaving out.
I used this recipe. However, I do use my electric Instant Pot to can. I’ve used it for about 5 years and I’m on my 2nd one. I can do 4-5 pints or 2 quarts at a time. I feel it is safer for me to use.
I realize that it isn’t approved by some…but I’ve never had any issues. Just wanted to share that.
Can I use chicken broth instead of vegetable broth?
Yes, you can definitely swap vegetable broth with chicken broth. Consider using bone broth. You can either use store-bought broth or make your own by following my latest guide on how to can oxtail bone broth.
Can I substitute fresh green beans for the lima beans? I have no lima beans and tons of green (actually purple) beans. I’d like to try this recipe.
Absolutely, you can swap out the beans! I change up mine for whatever I have an abundance of. Keep your measurements the same though. Also, I recently added a Southern Style Crock Pot Green Beans. Throw in some potatoes and you have a yummy dinner.