
Canning sloppy joe meat in a pressure canner gives you shelf-stable, ready-to-heat meals for busy nights. This tested recipe method uses proper headspace, safe processing times, and altitude-adjusted pressure so your jars seal safely and store well.

Sloppy Joe is a favorite American sandwich filling, typically made with ground beef cooked in a slightly sweet tomato sauce and served on a hamburger bun. The meat is usually browned with onions, bell peppers, and garlic, then simmered with a combination of tomato sauce, ketchup, Worcestershire sauce, and various seasonings.

Canning Safety First
My focus here is clear, safe pressure canning for meat. I follow the guidelines from the National Center for Home Food Preservation. Their recommendations are research based and kept up to date. When it comes to canning meat, I stay with what’s been tested and approved.
Important Safety Information
- This recipe must be processed in a pressure canner.
- Water bath canning is not safe for meat.
- Processing times vary by altitude.
- Always follow the manufacturer’s instructions for your specific canner.
Main Ingredients Needed To Can Sloppy Joes

- Ground Beef: Choose lean ground beef. A little fat adds flavor, but too much leaves excess grease in the jar. Brown it and drain the fat well before packing.
- Onions: Yellow or white onions both work. Sweet onions give a softer flavor. Dice them evenly so they cook down into the meat.
- Green Bell Peppers: Seed and core before chopping. They cook down and sit right in the mixture without taking over.
- Tomato Juice: Use a thicker tomato juice, not a thin one. It should look rich when you pour it.
- Ketchup: Choose a thick ketchup, not runny. It helps the mixture stay spoonable after processing.
- Tomato Paste: This adds body to the meat mixture. It should be fully stirred in before filling jars.
Caution: Do not thicken with flour or cornstarch before canning.
Canning Sloppy Joes
Preparing the Meat Mixture
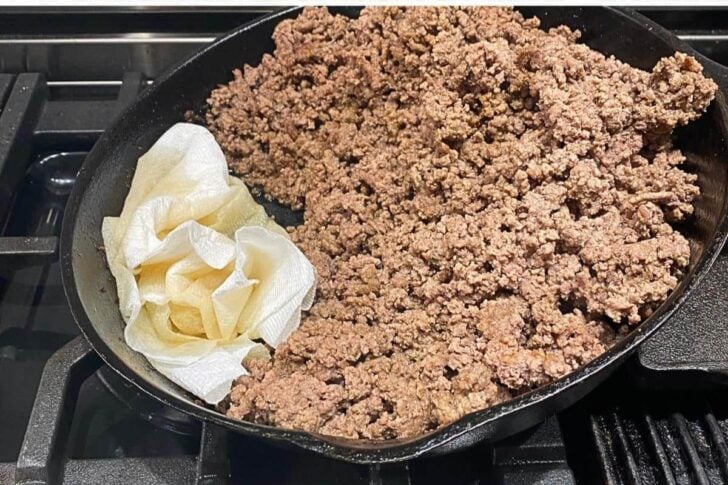
In a large skillet over medium heat, add the ground beef. Cook and crumble the meat until it is browned with no pink showing. Once the ground beef is cooked, tip the pan to allow the grease to drain to one side. Use paper towels to soak up the excess grease and discard them.
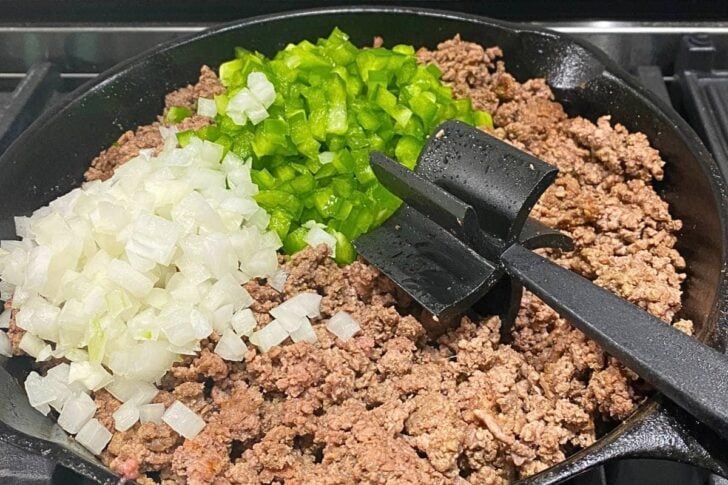
Return the cooked meat to the burner, set the heat to medium, and add the diced green peppers, minced garlic and chopped onions. Cook, stirring frequently, until the veggies are soft.

Transfer the meat mixture to a large stock pot. Add in the rest of the ingredients. Stir to combine and simmer on low heat for 1 hour. Be sure to stir frequently to prevent burning.
Note* If the sloppy joe mixture seems too thick, add 1/4 cup of water or tomato juice as needed.
Fill the Jars

Pack Jars:
Set a canning funnel in the jar and fill with beef cubes. Press down gently with a rubber spatula and leave 1 inch of headspace at the top for expansion.
Clean Rims:
Remove the funnel and wipe the rim with a damp paper towel so the lid can seal properly.
Apply Lids and Bands:
Center a new lid on each jar and screw the band on finger tight. Do not overtighten.
Pressure Canner Instructions
Refer to your pressure canner manual for exact water amounts and operation details. These are general steps using a standard pressure canner.
Add the recommended amount of water, usually 2 to 3 inches. Place filled jars on the rack and secure the lid. Heat on medium-high.
Vent the Pressure Canner
Allow a steady stream of steam to flow from the vent for 10 minutes. Then place the weight on or close the vent to begin building pressure.
Process at Correct PSI
Bring the canner to the correct PSI for your altitude. Once it reaches pressure, start your timer and maintain steady pressure for the full processing time listed in the recipe card.
Cool and Check Seals
Turn off the heat and let the canner return to zero pressure naturally. Remove jars and let them sit undisturbed for 12 to 24 hours. Check that lids are sealed before storing.

Common Questions About Canning Sloppy Joe Meat
Can you can sloppy joe meat with beans?
No, you should not can sloppy joe meat with beans unless you are using a tested recipe that specifically includes beans. When you start adding beans to a meat mixture, you change the density inside the jar. That affects heat penetration during processing. Safe pressure canning times are written for very specific ingredient combinations.
Do I have to brown the meat first?
Yes. For this sloppy joe pressure canning recipe, the meat needs to be browned first. Raw packed ground beef in a sauce like this would be too dense in the jar. Browning it first lets you break it up, cook it through, and drain the fat before filling jars. Drain it well. That keeps excess grease from rising in the jar during processing. Browned and drained. That’s the standard.
Can I reduce the sugar?
Yes, you can reduce the sugar in a sloppy joe pressure canning recipe. Sugar in this type of recipe is there for flavor, not preservation. It does not affect the safety of the pressure canning process for meat. You can cut it back to suit your taste. I would reduce it a little at a time and taste the mixture before filling the jars. Once it’s processed, the flavor will be set.
How long does pressure-canned sloppy joe last?
Pressure-canned sloppy joe will keep its best quality for about 12 months when stored properly. Keep the jars in a cool, dark place. Once sealed and stored well, they remain safe as long as the seal holds, there are no signs of spoilage, and the lid stays firm in the center. After a year, the color and flavor can start to fade a bit. It’s still usable if the seal is intact, but I try to rotate and use mine within that first year. If a jar has an unsealed lid, is leaking, bulging, or has an off smell when opened, it goes in the trash.

If you’re building out your meat canning pantry, here are a few more tested recipes you might enjoy.
- See my full guide to pressure canning chili with ground beef, written for safe headspace, proper venting, and altitude-adjusted processing.
- Learn how to can roast beef in a pressure canner, with clear steps for raw-pack or hot-pack methods.
- Read through my step-by-step method for canning vegetable soup with meat or without, using tested pressure canning times for mixed ingredients.
Favorite Canning Supplies
If you have any questions about making this recipe, feel free to ask in the comments below. I’m here to help! You can also snap a photo and tag @intentionalhospitality on Instagram.💛 I love seeing your creations!

Canning Sloppy Joes in a Pressure Canner
Ingredients
- 4 pounds ground beef , lean 90/10
- 1 cup onion , diced
- 1 1/2 cups green bell pepper , seeded and diced
- 4 cloves garlic , minced
- 2 teaspoons smoked paprika
- 2 tablespoons Worcestershire sauce
- 2 cups tomato juice
- 6 ounce tomato paste, can or tube
- 1 cup ketchup
- 2 tablespoons vinegar, apple cider
- 1 cup brown sugar
Instructions
Sloppy Joe Meat Mixture
- In a large skillet over medium heat, add the ground beef. Cook and crumble the meat until it is browned with no pink showing.4 pounds ground beef
- Once the ground beef is cooked, tip the pan to allow the grease to drain to one side. Use paper towels to soak up the excess grease and discard them.
- Return the cooked meat to the burner, set the heat to medium, and add the diced green peppers and chopped onions. Cook, stirring frequently, until the veggies are soft.1 cup onion , 1 1/2 cups green bell pepper , 4 cloves garlic
- Transfer the meat mixture to a large stock pot. Add in the rest of the ingredients. Stir to combine and simmer on low heat for 1 hour. Be sure to stir frequently to prevent burning.2 teaspoons smoked paprika, 2 tablespoons Worcestershire sauce, 2 cups tomato juice, 6 ounce tomato paste, 1 cup ketchup, 2 tablespoons vinegar, 1 cup brown sugar
- Note* If the sloppy joe mixture seems too thick, add 1/4 cup of beef broth as needed.
Filling Jars
- Place a canning funnel in the clean staralized jar for easy clean filling of the jars. Fill the jars with sloppy joe mixture. Push the meat down gently using a small rubber spatula. However, leave enough room for expansion during the canning process. When filling the jar with meat, make sure to leave a space of 1-inch headspace from the rim.
- After filling the jar, remove the funnel and wipe the rim of the jar with a clean damp paper towel. This will remove any food particles and ensure that the lids properly seal. Continue until all jars afe filled.
- Place a new lid on top of each jar, ensuring it is centered. Then, screw on the bands until they are finger-tight. Avoid overtightening, as it can prevent air from escaping during the canning process.
Pressure Canner Instructions
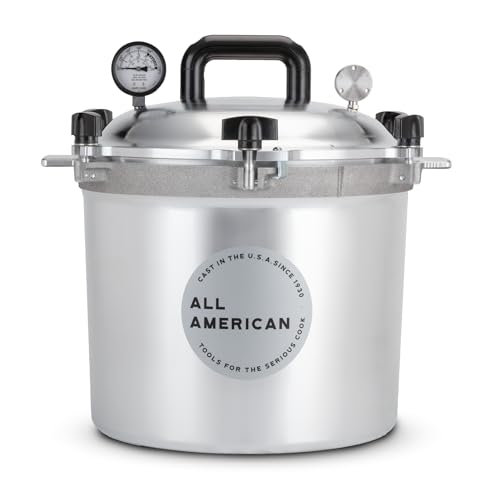
- Refer to your pressure canner's manual for specific instructions on adding water and using the canner. Below are general instructions for an All-American Pressure Canner.
- Begin by adding the appropriate amount of water to your pressure cooker based on the manufacturer's instructions. Typically, you'll need to add about 2 to 3 inches of water to create steam for the canning process.
- Place the loaded jars in the pressure cooker, following the cooker's guidelines for spacing and capacity. Place the canner lid on and tightly secure it. Turn the stove burner on medium-high heat.
- Allow the canner to heat until a steady flow of steam is seen coming out of the vent. The steam indicates the canner is purging the air and achieving a proper internal temperature.
- Depending on the size and type of your canner, allow the canner to heat up and produces a steady stream of steam. However, referring to your specific canner's manual for recommended times is important.
- Once the canner has been purged of air and a steady flow of steam is observed for 10 – 15 minutes, you can add the weight or close the vent, depending on the type of pressure canner you're using. This will allow pressure to build up inside the canner.
- The canner will take additional time to reach and stabilize at the desired pressure for your recipe. The specific pressure will depend on the altitude and type of canner you have.
- Once the pressure is reached, start the timer for the required processing time. The processing time and pounds of pressure will depend on your altitude. Processing time will vary depending on the size of your jars. See the chart in the recipe card notes below.
Gina’s Notes and Tips
| Recommended process time for Sloppy Joe in a dial-gauge pressure canner. | ||||||
| Canner Gauge Pressure (PSI) at Altitudes of | ||||||
| Style of Pack | Jar Size | Process Time | 0 – 2,000 ft | 2,001 – 4,000 ft | 4,001 – 6,000 ft | 6,001 – 8,000 ft |
| Hot | Pints | 60 min | 11 lb | 12 lb | 13 lb | 14 lb |
| Quarts | 70 | 11 | 12 | 13 | 14 | |
| Recommended process time for Sloppy Joe in a weighted-gauge pressure canner. | ||||
| Canner Gauge Pressure (PSI) at Altitudes of | ||||
| Style of Pack | Jar Size | Process Time | 0 – 1,000 ft | Above 1,000 ft |
| Hot | Pints | 60 min | 10 lb | 15 lb |
| Quarts | 70 | 10 | 15 | |


Yield 4 quarts. added 5# ground beef. 1/4 cup yellow mustard. 1 15oz can of diced tomatoes. 1 teaspoon black pepper. No brown sugar.
I like the idea of not adding the brown sugar. It would become a quick beef base for all kinds of other recipes.