This roasted red pepper spread is a family favorite, so I preserve a big batch each year. The whole house feels cozy and inviting when I pull a tray of blistered peppers and tomatoes out of the oven.
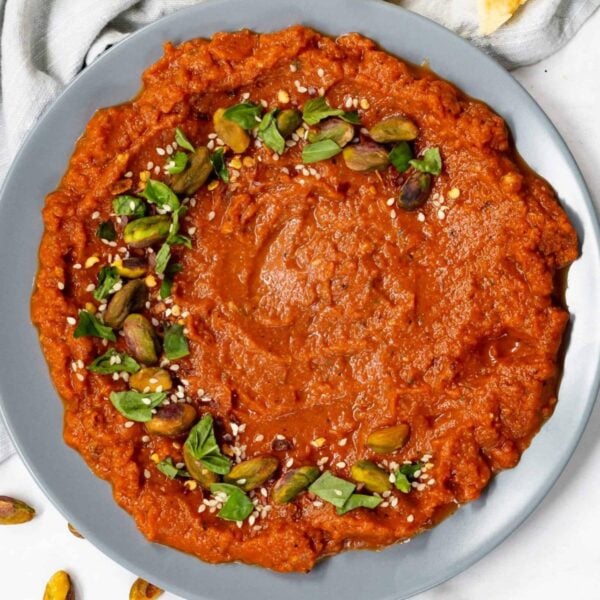
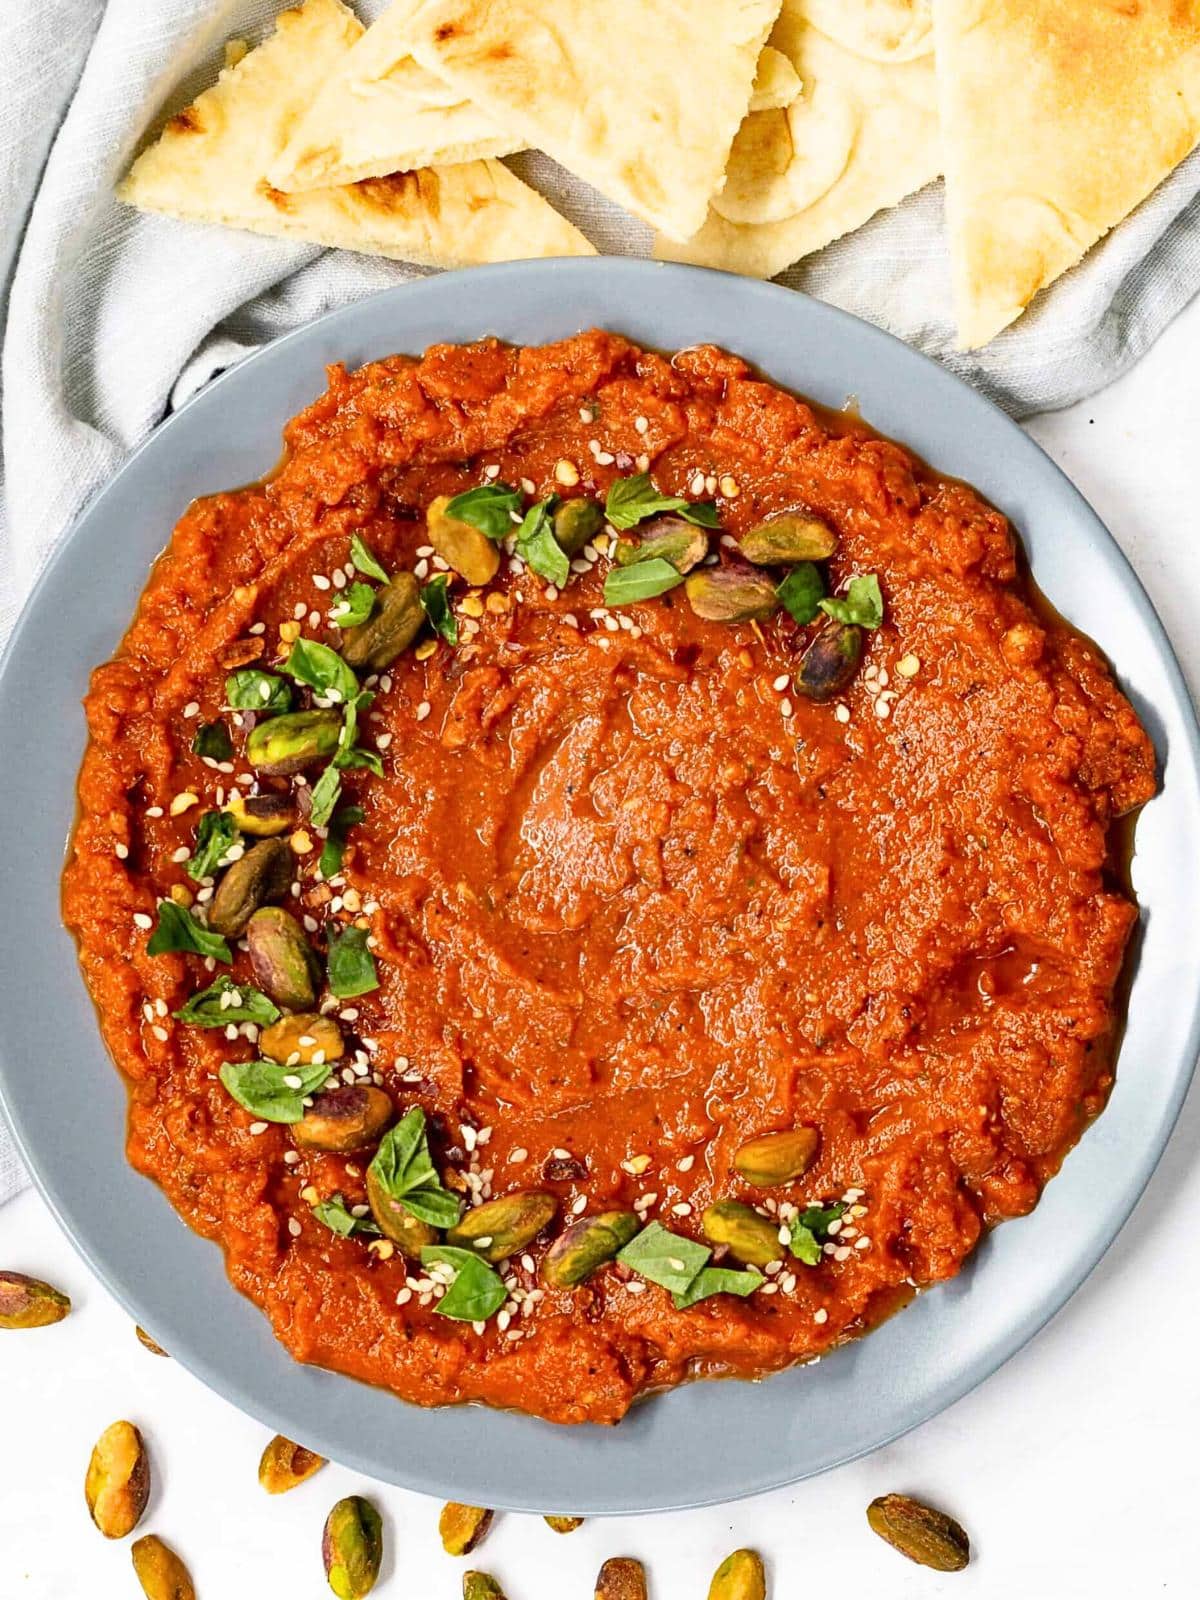
I like to keep a few jars of this roasted red pepper spread tucked in my pantry because it turns an ordinary snack board into something special. It spreads like a dream on crusty bread, doubles as a flavorful dip or sauce, and even makes a thoughtful gift for friends. Having it ready ahead of time makes hosting so much easier, and the bright roasted flavor always brings compliments.

Gina’s Notes For Making Roasted Red Pepper Spread
This spread is all about that rich, smoky-sweet flavor that makes everyone return for seconds. It’s an easy canning recipe, or you can freeze the spread in small containers. I love that it works as a dip, sauce, or a sandwich spread. I have a few other homemade spreads for you, such as 5-Minute Fresh Basil Pesto Sauce or the sweet heat of 5 Minute Homemade Honey Sriracha Sauce.
Quick Recipe Tips Before You Get Started
Important prep tips before starting the recipe:
- Choose firm, shiny red peppers for the best flavor and easier peeling after roasting.
- Have your canning equipment sterilized and ready before you start cooking the spread.
Common Mistakes When Making This Recipe
- Skipping the steaming step after roasting will make peeling the peppers and tomatoes difficult.
- Avoid rushing the final simmer; the spread needs time to thicken and develop that jammy texture.
Ingredient Tips
Here’s a quick overview of the key ingredients for this recipe. For the full list of ingredients and exact measurements, be sure to check the recipe card at the bottom of this post.

- Red bell peppers: Choose firm, bright red peppers. For another way to use your red peppers, try my Creamy Roasted Red Pepper Dip.
- Italian plum tomatoes: These add body and a bit of natural sweetness. Roma tomatoes are a great substitute.
- Garlic: Roast the cloves unpeeled to bring out a sweet, mellow flavor. If you like a little more bite, add an extra clove.
- White onion: Balances the sweetness of the peppers. A yellow onion can work if that’s what you have.
- Red wine vinegar: Adds the perfect tang. Apple cider vinegar is a good swap.
How To Make Roasted Red Pepper Spread
Roast the Vegetables
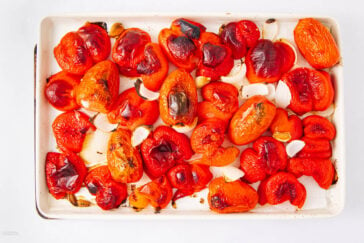
Preheat your broiler or grill to 400°F. Place halved peppers skin-side up along with tomatoes, unpeeled garlic, and quartered onion on a parchment-lined baking sheet. Roast until the skins are blistered and slightly blackened. Cover with foil and let steam for 10 minutes.


Prep the Vegetables & Cook
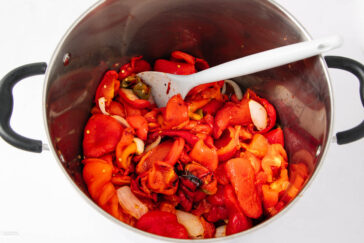
In a large saucepan, combine the roasted peppers, tomatoes, garlic, onion, red wine vinegar, sugar, and salt. Bring to a boil, then reduce to a simmer for 20 minutes, stirring occasionally. Puree with an immersion blender.


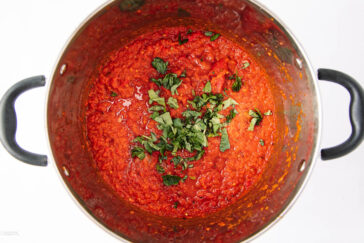
Add Basil and Pressure Can
stir in chopped basil. Simmer uncovered for 15 minutes until thick and jammy.
Ladle hot spread into half-pint jars, leaving 1-inch headspace. Remove air bubbles, wipe rims, and secure lids. Process in a pressure canner: 35 minutes at 11 psi for dial-gauge or 10 psi for weighted-gauge (adjust for altitude). Cool naturally, then let jars rest 12 hours. If you’re new to preserving spreads and sauces, you might also like my Canning 101 For Beginners guide to get started with confidence.


Pressure Canning Whole Tomatoes:
- Place jars in the pressure canner.
- Lock the lid and let the steam vent for 10 minutes.
- Add the pressure regulator and process according to the chart.
- Turn off the heat, let the pressure drop naturally.
- Open the lid, then remove jars after 5 minutes of rest. Place the jars on a towel on the kitchen counter for 12 hours.
Select the correct pressure based on your altitude:
| Recommended process time for Roasted Red Pepper Spread in a weighted-gauge pressure canner. | ||||
| Canner Gauge Pressure (PSI) at Elevations of | ||||
| Style of Pack | Jar Size | Process Time | 0 – 1,000 ft | Above 1,000 ft |
| Hot | Pints | 20 min | 10 lb | 15 lb |
| Quarts | 25 | 10 | 15 | |
Note
If you have a jar that does not seal properly, you can place the peppers in a freezer-safe container. Label and freeze for up to 3 months. Thaw overnight in the refrigerator when you are ready to use them. You could also skip the canning and freeze your red pepper spread instead.

Add ½ teaspoon crushed red pepper flakes or a few roasted chili peppers.
Variations, Substitutions, and Recipe Tips
Dietary Modifications: For low sugar, reduce the sugar by half or swap in honey or maple for a different flavor profile.
Flavor Enhancements: Try smoked paprika for an extra smoky note or a pinch of crushed red pepper or roasted chili for a gentle heat.
Add-In Options: When serving your red pepper spread, try stirring in some mascarpone for a creamy party dip, or fold in crumbled feta for a Mediterranean twist.
Tips for Recipe Success: Roast your peppers until the skins are deeply charred for the best flavor, drain any excess liquid before blending, and simmer until the spread thickens to a jammy texture to avoid watery results.
Storage and Reheating Instructions
- Keep sealed jars in a cool, dark spot like a pantry or cupboard for up to 1 year.
- Once a jar is opened, pop it in the fridge and enjoy within 1 to 2 weeks for the best flavor.
- Any unsealed jars can be frozen for up to 3 months. Thaw them overnight in the refrigerator before using, and give the spread a good stir to bring back its smooth texture.
Favorite Canning Supplies
Biblical Hospitality Tips For Serving Roasted Red Pepper Spread
“Perhaps, in the act of practicing biblical hospitality and loving our neighbors, we will come to know His heart in a deeper way.” — Intentional Hospitality
Homemade spreads like this roasted red pepper spread create natural opportunities for small, meaningful moments of connection. Instead of waiting for the perfect dinner party, let this simple recipe be your excuse to reach out. Package up some crackers or crusty bread and a jar of spread to take to a neighbor, or invite a friend for southern iced tea with a plate of crackers, cheese, and this vibrant dip. These quiet, thoughtful gestures often become the most memorable expressions of biblical hospitality.
Hostessing Tips for Cozy Gatherings
- Hospitality as Ministry: When you prepare this spread, set aside a jar to gift to someone outside your usual circle. Add a small handwritten note: “Thinking of you today, enjoy this little taste of home.” This small act can open doors for deeper connection and show God’s love in action.
- Fellowship Over Perfection: Instead of stressing over a full spread, create a simple snack board: crusty bread, your roasted red pepper spread, a few slices of cheese, and grapes, or pair it with a selection of these Easy Make Ahead Party Dips For A Crowd. Sit with your guest at the kitchen table, no fancy setup required. The goal is conversation, not performance.
Hospitality in Action
This week, choose one person you wouldn’t normally invite over: a neighbor you’ve waved to but never spoken with, or someone from church who often sits alone. Offer them a warm snack board featuring your homemade spread and simply listen. Let the conversation be the ministry.

Roasted Red Pepper Spread (Canning or Freezing)
Ingredients
- 6 pounds red bell peppers, about 15 medium, stems and seeds removed then cut in half
- 2 pound plum tomatoes, Italian , about 10
- 2 cloves garlic
- 1 white onion, small , peeled and quartered
- ½ cup red wine vinegar
- 1/3 cup sugar
- 1 teaspoon salt
- 2 tablespoons fresh basil, finely chopped
Instructions
Step 1: Roast the Vegetables
- Preheat your broiler or grill to 400°F.
- Place red peppers haves skin side up, tomatoes, garlic (unpeeled), and the quirted peeled onion on a parchment lined baking sheet.6 pounds red bell peppers, 2 pound plum tomatoes, 2 cloves garlic, 1 white onion
- Roast the vegetables until the skins of the peppers and tomatoes are blistered and slightly blackened. I should take about 20 minutes. The garlic and onion should be charred in spots and softened.

- Remove from heat. Place foil over the baking sheet and let it sit for 10 minutes to steam. This makes the skin easier to remove from the tomatoes and peppers.
Step 2: Prep the Vegetables
- Peel the skins off of the peppers and tomatoes and discard it.
- Cut the core out of the tomatoes.
Step 3: Cook the Spread
- In a large saucepan, combine the pepper and tomatoes, garlic, onion, red wine vinegar, sugar, and salt.1/3 cup sugar, 1 teaspoon salt, ½ cup red wine vinegar
- Bring to a boil, then reduce heat and simmer covered for about 20 minutes, stirring occasionally.
- Remove from the heat and use an immersion blender to puree the vegetables. This takes about 2 to 3 minutes.
- Stir in the chopped basil to the pan and return to heat. Simmer uncovered for 15 minutes until the spread thickens and mounds on a spoon.2 tablespoons fresh basil
Step 4: Pressure Can the Jars
- Pack red pepper spread into jars, leaving 1 inch of headspace.
- Remove air bubbles using a non-metallic utensil.
- Wipe jar rims clean, place lids on, and screw rings on fingertip tight.
- Place jars on rack in canner. Lock the lid and heat on high.
- Let canner vent steam for 10 minutes, then place weight on the vent.
- Dial-gauge canner: Process at 10 psi for 20 minutes for pints and 25 minutes for quarts. Adjust pressure if you're above 1,000 feet elevation.
- Weighted-gauge canner: Process at 10 psi for 20 minutes for pints and 25 minutes for quarts. Adjust pressure if you're above 1,000 feet elevation.
- Turn off heat and let canner cool naturally.
- Once pressure is released and lid removed, let jars sit in canner for 10 minutes.
- Remove jars using jar lifter and let cool undisturbed on a towel on the kitchen counter for 12 hours.
- Note* If you have a jar that does not seal properly you can place the peppers in a freezer safe container and cover with the liquid. Label and freeze for up to 3 months. Thaw over night in the refrigerator when you are ready to use them.
Storage & Shelf Life
- Remove rings, wipe jars, date and label.
- Store sealed jars in a cool, dark place for up to 1 year.
- Refrigerate any opened jars and use within 1 to 2 weeks
Gina’s Notes and Tips
|
Recommended process time for Roasted Red Pepper Spread in a weighted-gauge pressure canner.
|
||||
|
|
Canner Gauge Pressure (PSI) at Elevations of
|
|||
|
Style of Pack
|
Jar Size
|
Process Time
|
0 – 1,000 ft
|
Above 1,000 ft
|
|
Hot
|
Pints
|
20 min
|
10 lb
|
15 lb
|
|
Quarts
|
25
|
10
|
15
|
|
- Choose firm, shiny red peppers for the best flavor and easier peeling after roasting.
- Have your canning equipment sterilized and ready before you start cooking the spread.
- Skipping the steam step after roasting will make peeling the peppers and tomatoes much harder.
- Avoid rushing the final simmer, as the spread needs time to thicken and develop that jammy texture.
- Keep sealed jars in a cool, dark spot like a pantry or cupboard for up to 1 year.
- Once a jar is opened, pop it in the fridge and enjoy within 1–2 weeks for the best flavor.
- Any unsealed jars can be frozen for up to 3 months. Thaw them overnight in the refrigerator before using, and give the spread a good stir to bring back its smooth texture.


Tried this recipe?
Please consider Leaving a Review!
It would have been super helpful to give some explanation surrounding the yeast…..since the dip exploded in my fridge….
Heather, I just added a section to the post on what nutritional yeast is and why it is so good for you. I enjoy it as a dairy-free cheesy flavor sprinkled on popcorn.