
If you love classic tiramisu but want something that slices beautifully like a cake, this tiramisu dessert cake is going to be a new favorite on your dessert table. The first time I served this at a gathering, I watched everybody take that first bite, pause, and then immediately go back in for another forkful.
You get the deep espresso flavor, the whisper of Grand Marnier and rum, and that cool, creamy mascarpone, without ever turning on the oven. You can tuck it in the refrigerator the day before your party, church group, or family dinner and pull out a chilled pan of pure comfort when it’s time for dessert.

Tiramisu Dessert Cake
This easy tiramisu dessert cake recipe gives you all the classic Italian tiramisu flavor with a stress-free, no-bake method that’s perfect for hosting. The coffee-soaked ladyfingers stay light and delicate but hold their shape, the mascarpone cream is rich yet airy, and the cocoa dusting adds that pretty, slightly bitter finish that keeps every bite from feeling too sweet. Because it’s a make ahead tiramisu cake, you can assemble it the night before, let the flavors marry in the fridge, and slice clean, beautiful squares just like a tiramisu layer cake when your guests are ready for dessert, no last-minute frosting or decorating required. The longer those layers rest in the fridge, the more the coffee, cocoa, and cream come together. Look for more sweet recipes on my dessert page, where classic favorites and new crowd-pleasers are all gathered in one place.
Classic tiramisu is usually served as a sliced cake or in individual cups. This recipe layers coffee-soaked ladyfingers and mascarpone cream in a 9×13 pan, so it chills into a more scoopable dessert. You get all the traditional flavor in a format that readily serves guests.
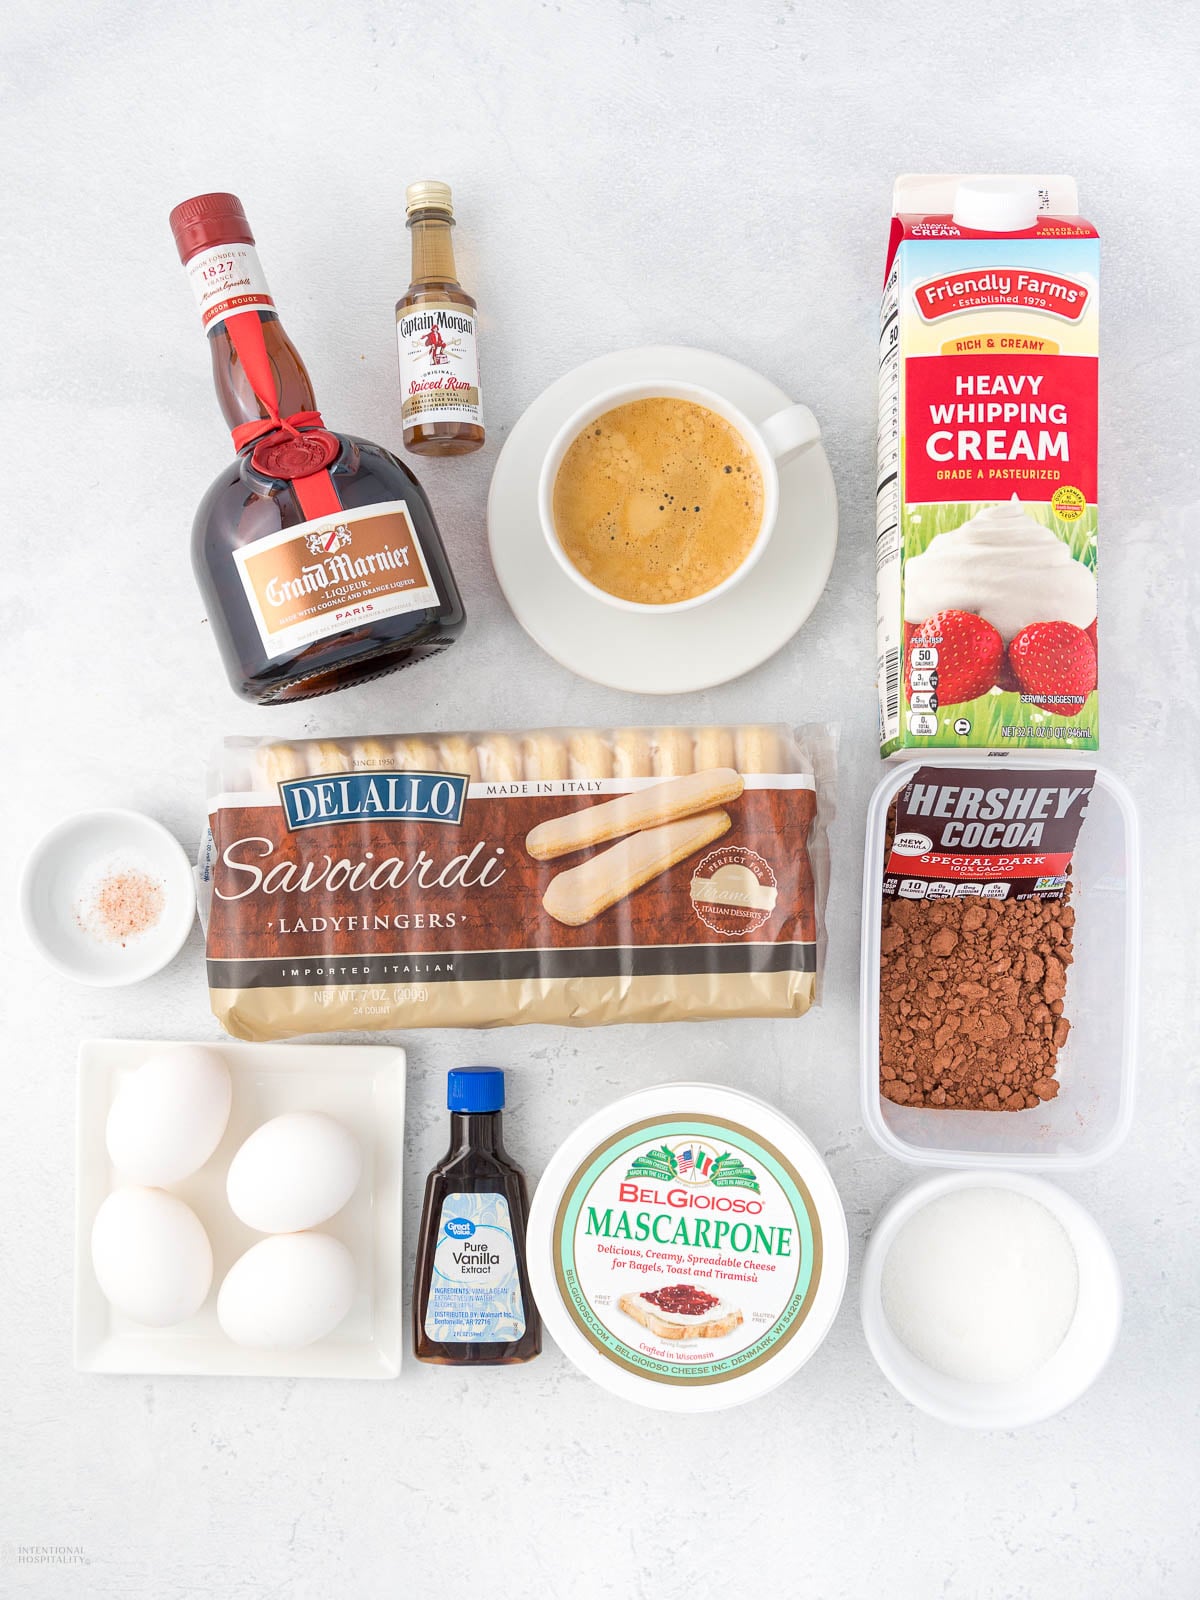
Ingredient Notes
Here’s a quick overview of the key ingredients for this recipe. For the full list of ingredients and exact measurements, be sure to check the recipe card at the bottom of this post.
For the Coffee Soak
- Espresso: Strong, freshly brewed espresso gives you the bold tiramisu flavor. You can also use very strong brewed coffee if you don’t have an espresso maker.
- Grand Marnier: A splash of Grand Marnier adds a gentle orange-citrus note that plays beautifully with the coffee and cocoa. You can substitute another orange liqueur or simply use more espresso for an alcohol-free version.
For the Ladyfinger “Cake” Layers
- Ladyfingers: These crisp, oval-shaped sponge cookies are the “cake” in this tiramisu layer cake. Look for Savoiardi-style ladyfingers for the most traditional texture, and just shorten the dip time if you’re using softer American-style ladyfingers.
For the Mascarpone Cream
- Mascarpone: This Italian soft cheese is the heart of the cream. It’s rich, slightly sweet, and very smooth. Keep it cold so it stays thick and stable.
- Spiced rum: A little rum adds depth and warmth to the mascarpone mixture. Dark rum or plain rum both work, or you can leave it out and add an extra splash of vanilla for a non-alcoholic version.
- Eggs: Yolks are whisked with sugar to create a silky base, and beaten whites are folded in to lighten the mascarpone cream and give it an airy texture.
- Granulated sugar: Sweetens both the yolks and whites and helps them whip to a stable foam.
- Heavy cream: Whipped with vanilla and folded into the mascarpone mixture for extra richness and a cloud-like finish. Make sure it’s cold and at least 36% fat so it whips properly.
- Unsweetened dark cocoa powder: A generous dusting on top gives you that classic tiramisu look and flavor without adding extra sugar.
How To Make Tiramisu Dessert Cake
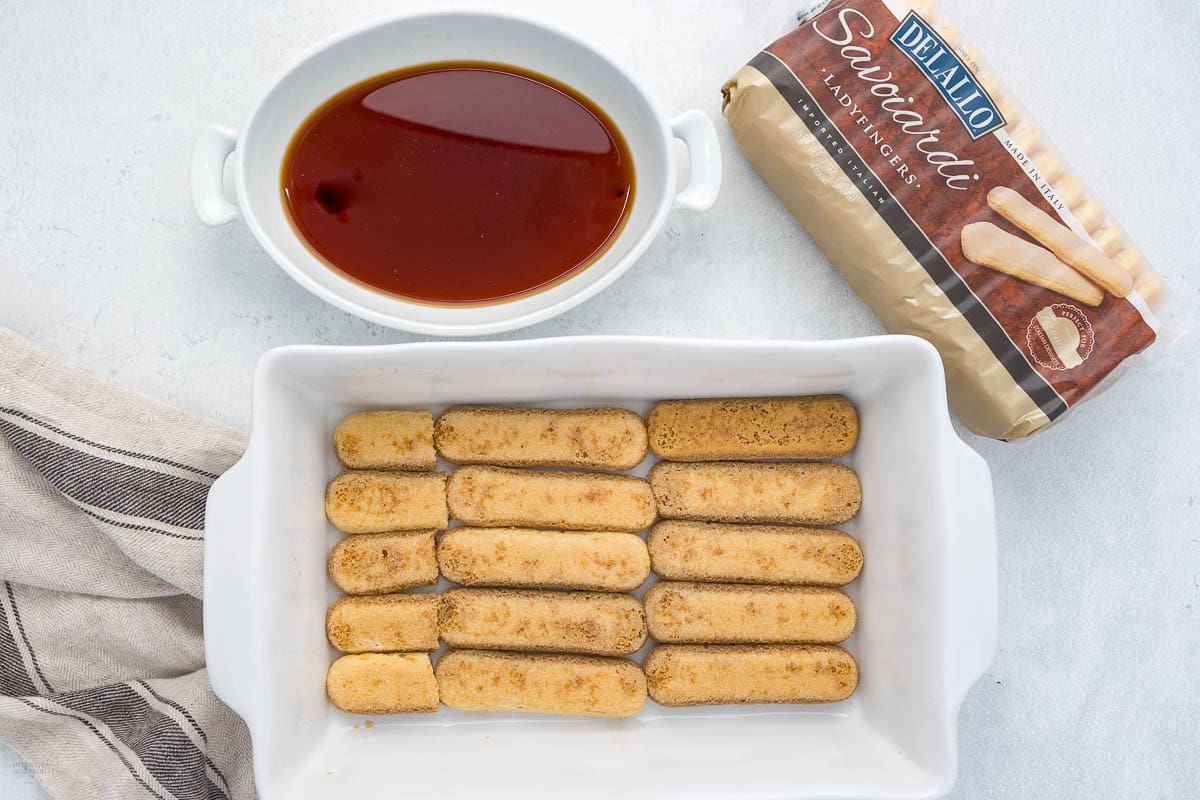
Dip and Arrange First Layer of Ladyfingers
You’ll need a 9×13-inch baking dish (or similar) with at least a 12 to 14 cup capacity.
Pro Tip: If your dish has rounded corners, tuck half ladyfingers into the corners to create a more even layer for slicing later.
In a shallow bowl, stir together the espresso and Grand Marnier. You want a vessel wide enough to quickly dip each ladyfinger without breaking it.
Pro Tip: Let the espresso cool slightly so the ladyfingers don’t fall apart when dipped.
Divide the ladyfingers in half, reserving one half for the top layer. Quickly dip each ladyfinger in the coffee mixture, coating both sides. It should be a quick in-and-out dip rather than a soak. Arrange them in a tight, single layer in the dish, trimming pieces to fill any gaps.
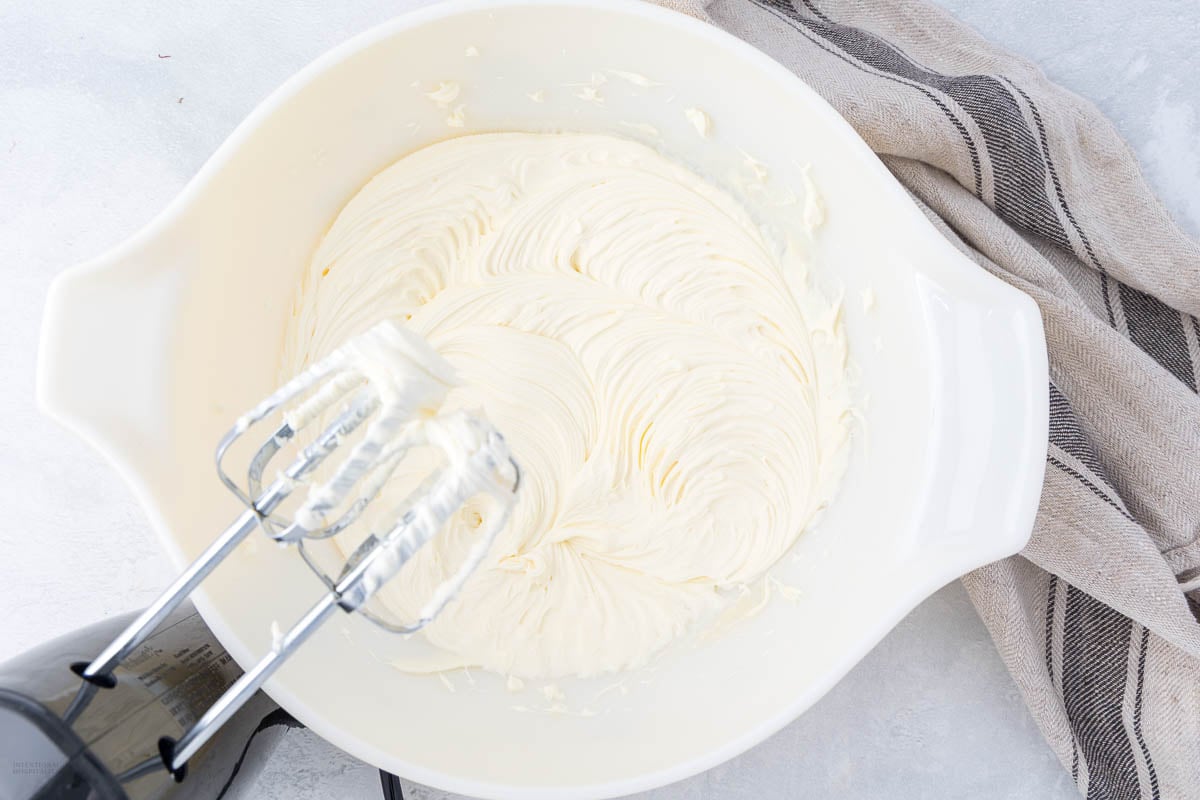
Make Mascarpone Cream Base
In a large bowl, beat the cold mascarpone and spiced rum on medium speed just until smooth, then set aside. Do not overmix or the mascarpone can turn grainy. Once it’s blended, set the bowl aside while you prepare the egg yolks.
Cook Egg Yolks with Sugar
Set up a double boiler by placing a heatproof bowl over a small pot of simmering water without letting the bowl touch the water.
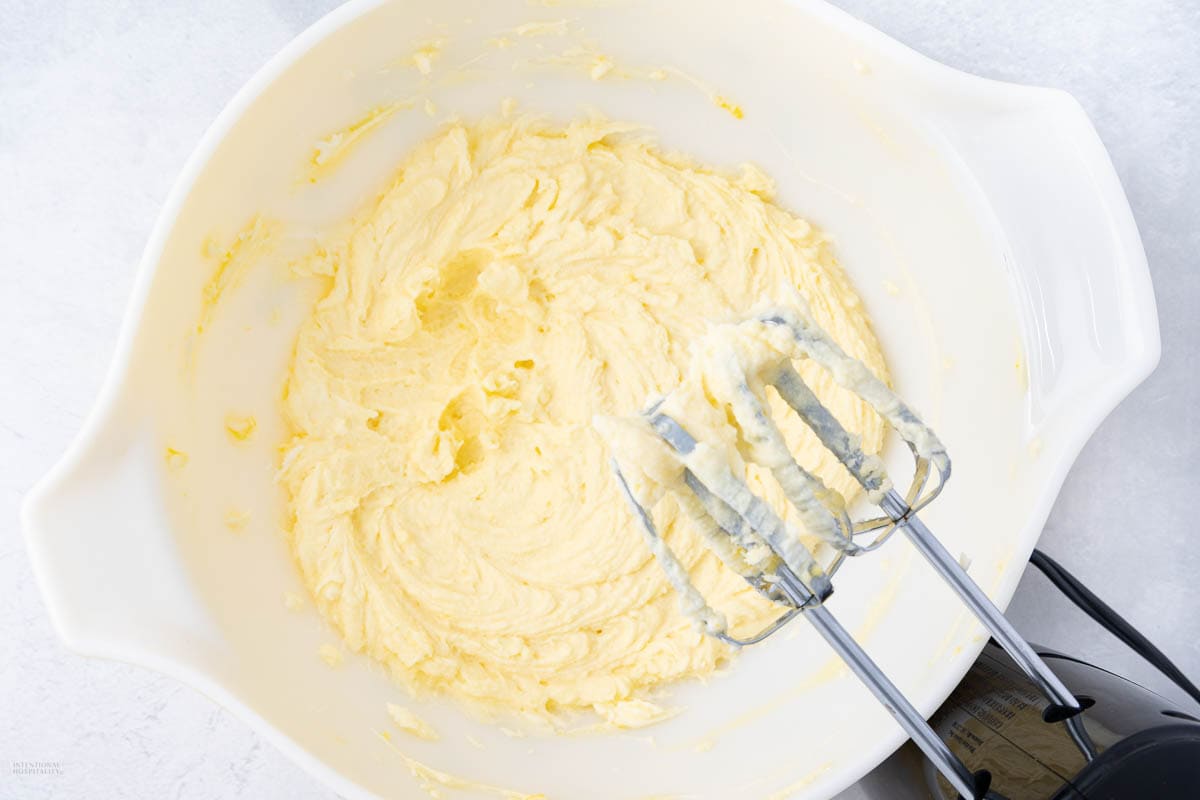
Whisk the egg yolks and ¼ cup of sugar over medium-low heat until pale, thick, and foamy, about 5 minutes.
Remove from the heat, then pour this warm yolk mixture into the mascarpone and mix on medium speed until smooth and silky.


Whip the Heavy Cream
In a separate bowl, beat the cold heavy cream and vanilla on medium-high speed until medium peaks form, about 3 minutes.
Gently fold the whipped cream into the mascarpone mixture until no streaks remain.


Beat Egg Whites and Fold Them In
In a clean, dry bowl, beat the egg whites and salt on medium-high until foamy for about 1 minute.
Slowly add the remaining ¼ cup sugar, then beat on high until stiff, glossy peaks form, 4 to 5 minutes, and gently fold into the mascarpone mixture.
Pro Tip: Fold with slow, sweeping motions and stop as soon as the mixture looks even to keep the cream light.


Layer Ladyfingers and Mascarpone Cream
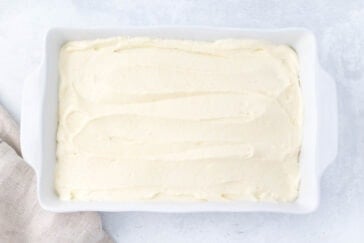
Spread half of the mascarpone mixture over the first layer of ladyfingers.
Dip the remaining ladyfingers in the coffee mixture and arrange in a second layer, then spread the rest of the mascarpone cream evenly over the top.


Chill and Finish with Cocoa
Refrigerate the tiramisu, uncovered, for 2 to 3 hours so the cream starts to set.
Dust the top generously with unsweetened dark cocoa powder, cover, and chill for at least 8 to 9 more hours or up to 24 hours before serving.

You can. Strong hot chocolate, a coffee-flavored herbal tea, or even a robust black tea will give you a similar soaking effect without the coffee flavor or caffeine. Just keep the liquid warm when you mix in your sugar and flavorings so it dissolves smoothly.
Variations, Substitutions, and Recipe Tips
Dietary Modifications: For an alcohol-free version, leave out the Grand Marnier and spiced rum and replace them with extra espresso or strong brewed coffee. To reduce caffeine, use decaf espresso or strong decaf coffee instead.
Flavor Enhancements: For a flavor twist, swap the Grand Marnier and rum for amaretto, coffee liqueur, or dark rum, or add a little orange zest to the mascarpone and a sprinkle of finely chopped dark chocolate or mini chocolate chips between layers.
Add-In Options: To dress up the top, dust with cocoa and finish with shaved chocolate or chocolate curls, or line the sides of the dish with upright ladyfingers for a more cake-like presentation.
Simple Substitutions: Use very strong brewed coffee if you don’t have espresso, or a mix of softened cream cheese and a little heavy cream if mascarpone isn’t available. In a pinch, you can use thin slices of sponge or pound cake instead of ladyfingers, but the texture will be different.
Tips For Recipe Success: Quickly dip the ladyfingers so they stay moist but don’t fall apart, keep the mascarpone cold so the cream stays thick, whisk the yolks and sugar until pale and foamy, fold in the whipped cream and egg whites gently, and chill at least 8 hours, preferably overnight, for the best flavor and clean slices. For more easy desserts you can prep ahead, try my Easy No-Bake Strawberry Angel Food Cake for something light and fruity, or this rich No-Bake Chocolate Peanut Butter Pie if you love a chocolate-peanut butter twist.

Hospitality Challenge
Keep the vibe cozy with a soup night that ends with chilled squares of your tiramisu cake. You can make this Chicken Tortellini Soup Crock Pot Recipe (Creamy & Easy) and complement it with a baked potato station featuring Perfect Air Fryer Baked Potatoes with a variety of toppings, or a Salad Bar Salad. Slice the tiramisu cake at the table and invite a one-minute gratitude round. Consider reading aloud during the meal: “The steadfast love of the Lord never ceases; his mercies never come to an end; they are new every morning; great is your faithfulness” (Lamentations 3:22 to 23, ESV). Then ask if anyone has a prayer need you can remember this week. It is humble, low-stress, and a sweet way to let the love of Christ be tasted and seen.
More No‑Bake Desserts for Your Table
- No-Bake Chocolate Covered Strawberry Jello Pie
- No-Bake Jello Orange Pie
- Creamy No Bake Pumpkin Pie
- No Bake Cherry Delight Recipe With Pie Filling
- Layered No-Bake Banana Split Cake
This easy tiramisu dessert cake is rich, cool, and sliceable; an easy tiramisu dessert cake that lets you serve a special-occasion treat without ever turning on the oven. If you have any questions about making this recipe, feel free to ask in the comments below. I’m here to help!

Creamy Tiramisu Dessert Cake
Ingredients
- 1 cup espresso, strong
- 5 tablespoons Grand Marnier
- 40-45 ladyfingers
- 16 ounces mascarpone, cold
- 2 tablespoons spiced rum, you could also use dark rum if you prefer
- 4 egg, whites
- 4 egg, yolks
- 1/2 cup granulated sugar, divided
- 2 cups heavy cream or heavy whipping cream, cold
- 1/2 teaspoon vanilla extract
- 1/8 teaspoon salt
- 1/3 cup unsweetened dark cocoa powder, for dusting
Instructions
Prep Baking Dish
- You’ll need a 9×13-inch baking dish or something similar with a capacity of at least 12-14 cups. Set it aside.
Dip First Layer of Ladyfingers
- Mix the espresso and Grand Marnier in a shallow bowl.1 cup espresso, 5 tablespoons Grand Marnier
- Divide the ladyfingers in half and set the other half aside for later. Quickly dip each ladyfinger, one at a time, into the espresso mixture. Just a quick dip on both sides—don’t let them get too soggy or they will fall apart.40-45 ladyfingers
- Arrange the dipped ladyfingers in the bottom of the baking dish, forming a solid layer. If needed, cut some ladyfingers to fit.


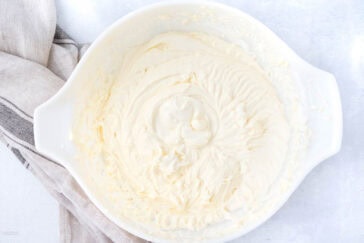
Make Mascarpone Cream
- In a large bowl, use a mixer to briefly beat the mascarpone and rum together on medium speed until combined. Be careful not to overmix. Set aside.16 ounces mascarpone, 2 tablespoons spiced rum
Prepare Egg Yolks
- Set up a double boiler by placing a heatproof bowl over a small pot of simmering water (medium-low heat). Make sure the water doesn’t touch the bowl.
- In the bowl, whisk the egg yolks and 1/4 cup of sugar together until light and foamy (about 5 minutes). Remove from heat and pour the yolk mixture into the mascarpone. Mix on medium speed until smooth.4 egg, 1/2 cup granulated sugar

Whip the Heavy Whipping Cream
- In a separate bowl, use a mixer to whip the heavy cream and vanilla extract on medium-high speed until medium peaks form (about 3 minutes). Medium peaks will be soft but hold their shape.2 cups heavy cream or heavy whipping cream, 1/2 teaspoon vanilla extract
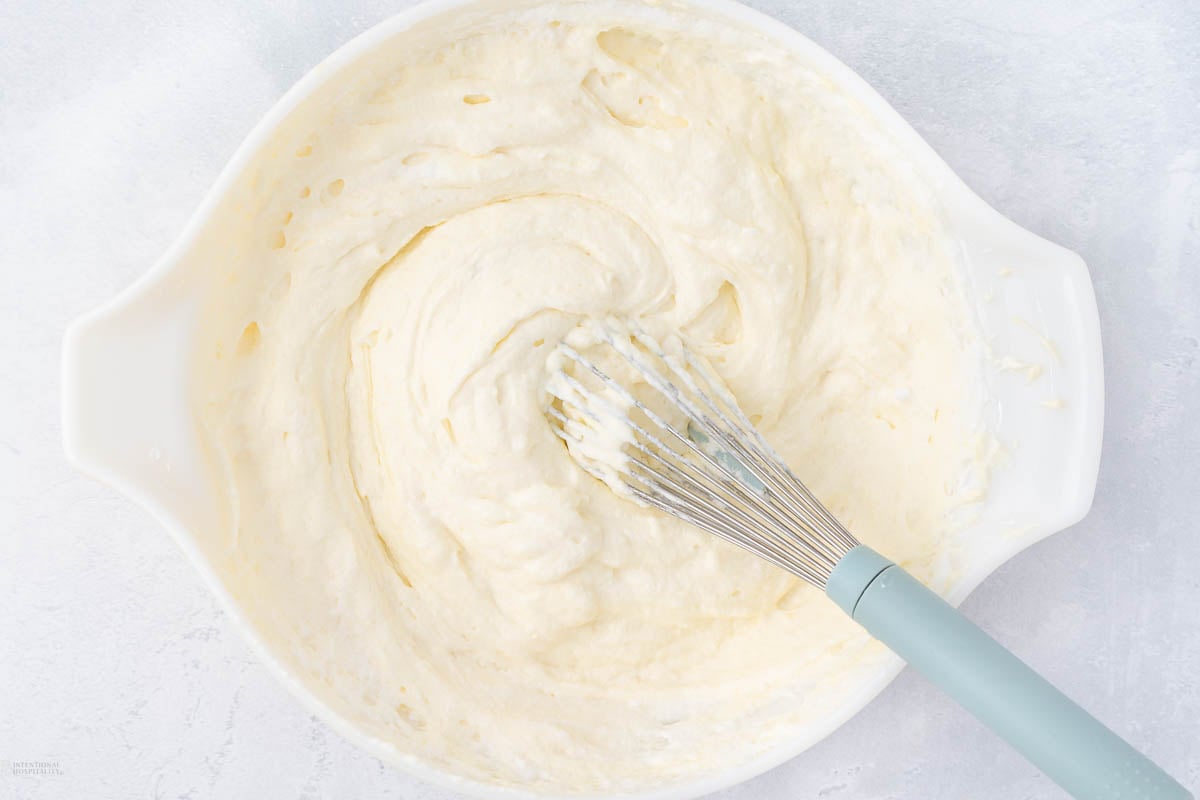
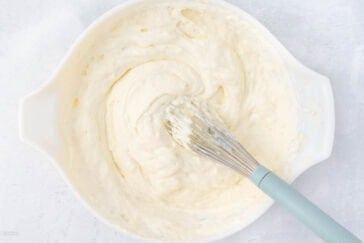
- Gently fold the whipped cream into the mascarpone mixture.
Whip Egg Whites
- In another clean bowl, use a mixer to beat the egg whites and salt on medium-high speed until foamy (about 1 minute).4 egg, 1/8 teaspoon salt
- Gradually add the remaining 1/4 cup of sugar, then increase the speed to high and beat until stiff peaks form (about 4-5 minutes). Stiff peaks stand up straight when you lift the whisk.
- Gently fold the egg whites into the mascarpone mixture.
Assemble the Tiramisu
- Spread half of the mascarpone mixture evenly over the first layer of ladyfingers.
- Dip the remaining ladyfingers in the espresso mixture, as before, and arrange them on top of the mascarpone layer. Press them down gently.
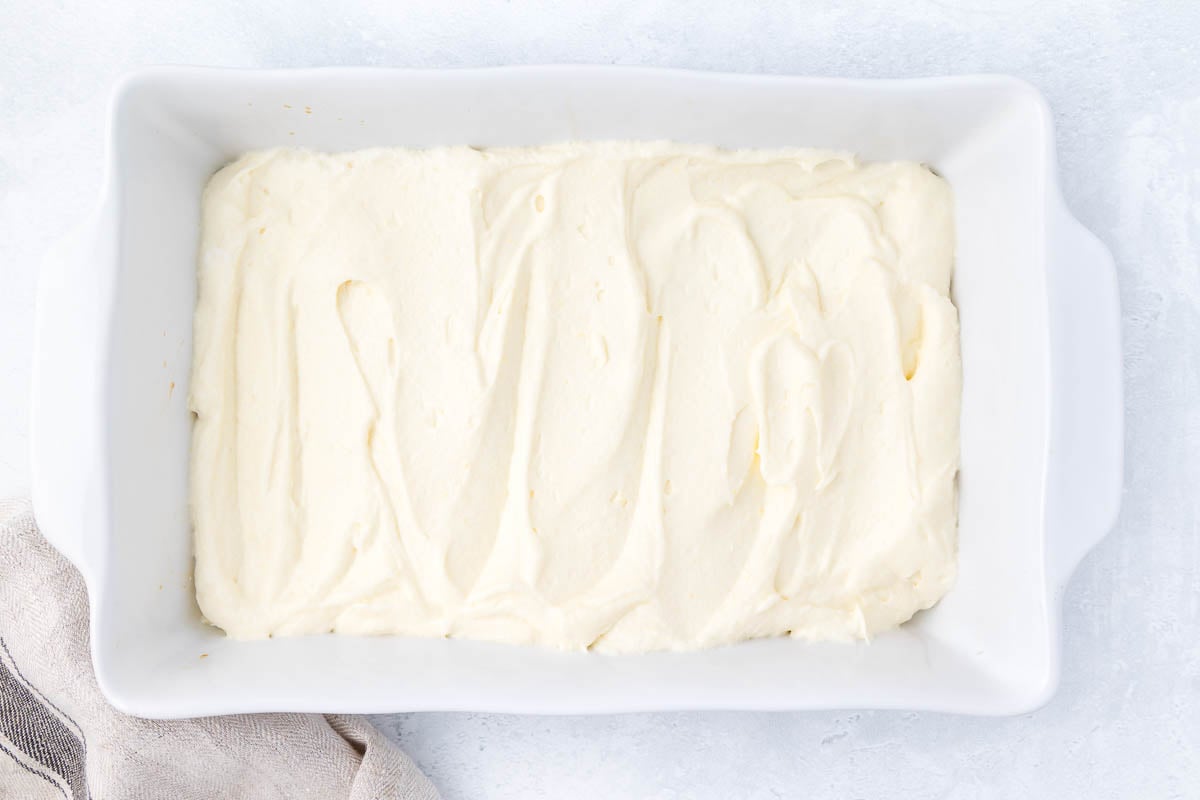
- Spread the remaining mascarpone mixture evenly on top of the second layer of ladyfingers.
Chill and Add Cocoa Powder:
- Refrigerate the tiramisu, uncovered, for 2-3 hours.
- After the terimisu has chilled 3 hours, sift a thick layer of unsweetened cocoa powder over the top.
- Cover the dish with plastic wrap or foil and refrigerate for at least 8-9 more hours (or up to 1 day).
Serve
- When ready to serve, use a sharp knife to slice the tiramisu. Wipe the knife between cuts for neat slices.
- Use a small spatula to lift the pieces out of the dish.
Gina’s Notes and Tips
- Room Temperature: Because this tiramisu dessert cake contains eggs and dairy, leave it out for no more than 1to 2 hours while serving, then return any leftovers to the fridge.
- Fridge: Cover the dish tightly with plastic wrap or foil and store in the refrigerator for up to 3 days.
- Freezer: You can freeze leftover tiramisu for up to 3 months. For easiest serving later, cut into portions, wrap each slice well, then place in an airtight container or freezer-safe bag.
- Serve Again: Serve tiramisu chilled. If frozen, thaw portions overnight in the refrigerator and let them sit at room temperature for 15 to 20 minutes before serving.
Tried this recipe?
Please consider Leaving a Review!